

Import Tests From Testmo
Export your tests in Testmo as a CSV file and bring them into Testomat.io. There are two ways to do it.
| Method | Use it when |
|---|---|
| CSV import | Your Testmo export goes straight in |
| Migration script | You need to reshape the file first - rename columns or restructure your cases |
Export Testmo file
Section titled “Export Testmo file”- Open your Testmo project.
- Export your test cases to CSV file.
- Save it on your computer.
Import your Testmo file
Section titled “Import your Testmo file”Start importing your tests to Testomat.io:
- Open your project and go to the Tests tab.
- Click the (
…) menu. - Choose Import from other TMS.
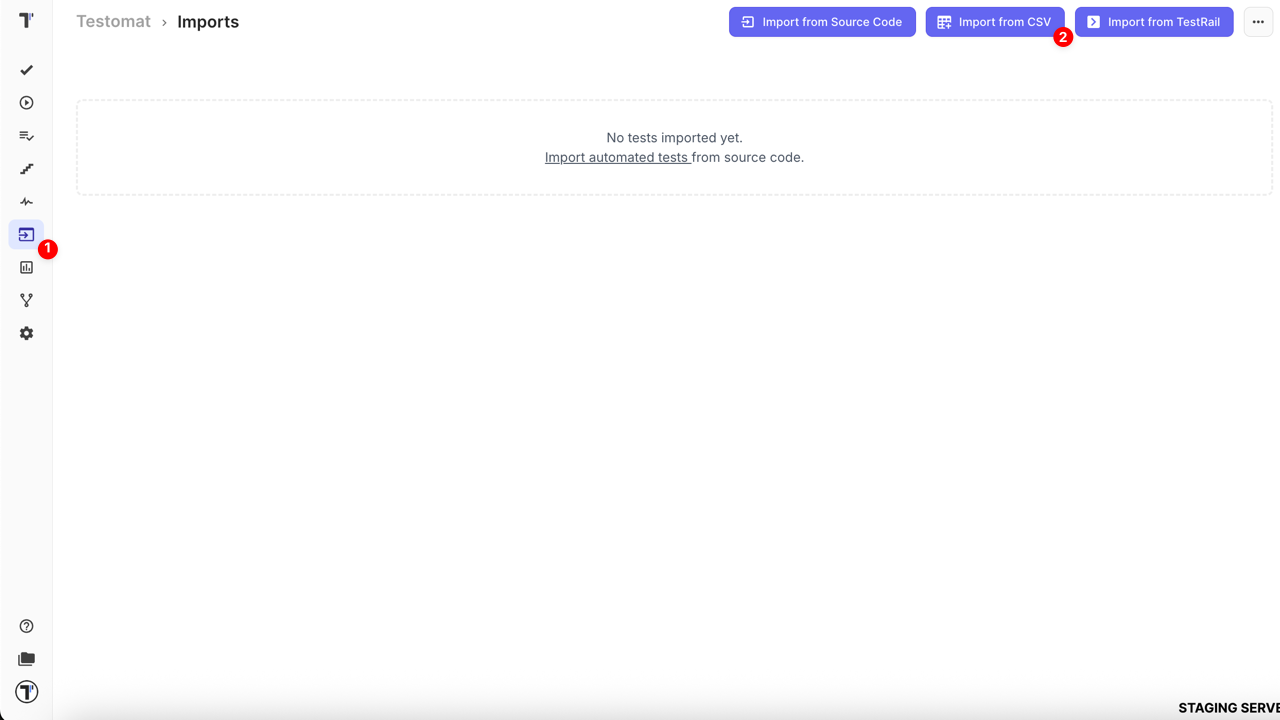
In the Imports window:
- Click Import.
- Choose Import from CSV. A sidebar opens on the right.
- Choose Testmo from the dropdown.
- Click Choose file, select your exported CSV.
- Click Create.
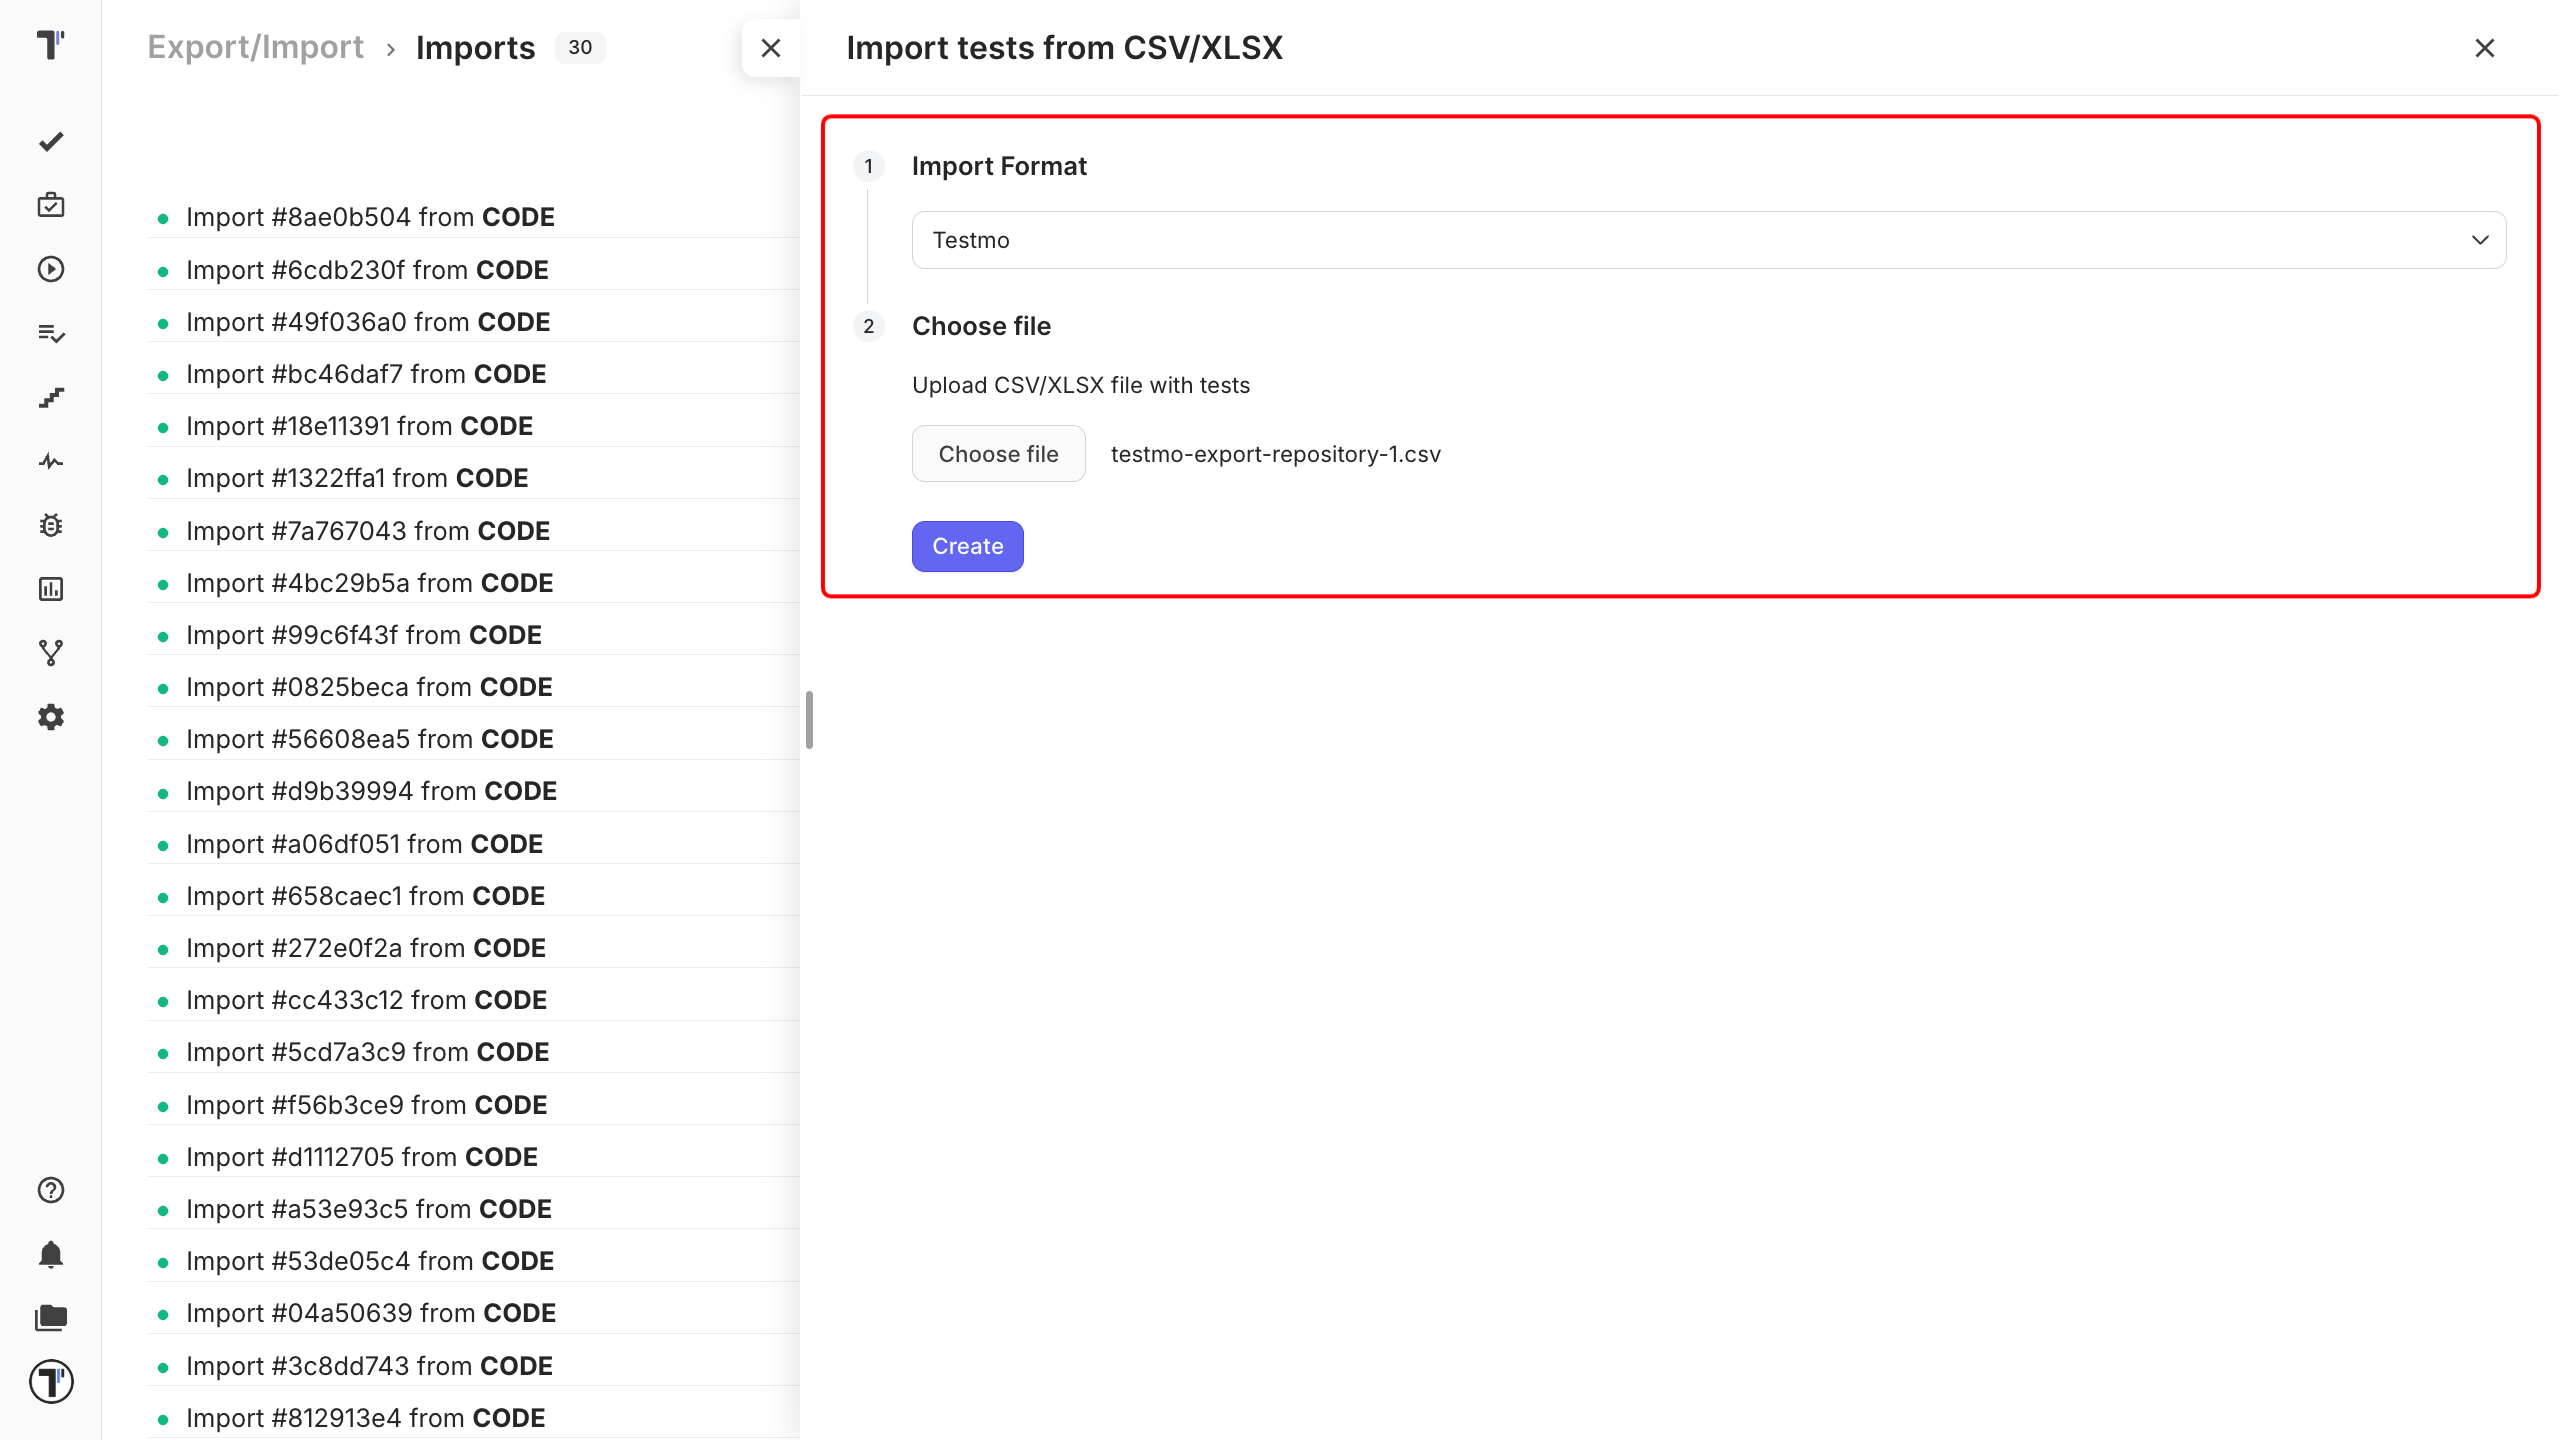
Testomat.io reads the file, and your tests appear on the Tests page.
Reshape with migration script
Section titled “Reshape with migration script”Use the custom migration script to convert a Testmo CSV file into Testomat.io’s CSV format. This method is recommended if you need customization or want to adjust the structure of your test cases during the migration process.
Click migration script instructions to access the script and get started.
Turn your tests into BDD scenarios
Section titled “Turn your tests into BDD scenarios”You can also import your BDD projects into Testomat.io. Follow the import steps in your BDD project. Every row of CSV file becomes a scenario:
- Precondition becomes Given
- Step becomes When
- Expected Result becomes Then
Your tests are saved as feature files. Leave the checkbox clear and they arrive as classic test cases instead. Full details are in Import from CSV/XLSX.
If this doesn’t work
Section titled “If this doesn’t work”- The import fails. Check that the first row of your file holds column names.
- Your folders are flat. Make sure you picked Testmo in the dropdown, not another format.
- Something is still off. Contact support with your file attached.
Next steps
Section titled “Next steps”- Import from CSV/XLSX - the column reference and every other supported format.
- Running Tests Manually - run the tests you just imported and record the results.
- Labels and Custom Fields - organize your imported tests by priority, type, or any Testmo field.